


This guide defines whether aluminium window frames can be repaired and what repair means for residential settings in South Africa.
The article explains common categories: glass replacement, surface dents and oxidation, seal renewal, and hardware fixes. It sets realistic outcomes for homeowners and notes when repair preserves comfort and energy efficiency.
Repairability depends on the type of damage, the condition of surrounding components, and the existing finish.
Some tasks suit competent DIYers, such as replacing seals or tightening hardware. Others need professional assessment, especially where alignment or specialised finishes are involved.
Practical intent: this neutral, safety-first guide offers decision support rather than pushing replacement. Readers will find a clear, stepwise path later in the article to decide the best route for their windows.
Key Takeaways
- Aluminium window frames often have repair options that restore function and comfort.
- Common fixes include glass, surface repairs, seals, and hardware adjustments.
- Repair success depends on damage type, adjacent components, and finish condition.
- Some repairs are DIY-friendly; others require professional skills and tools.
- Timely repair can reduce drafts, leaks, and improve energy efficiency.
Why Aluminium Window Frames Still Need Repairs Over Time
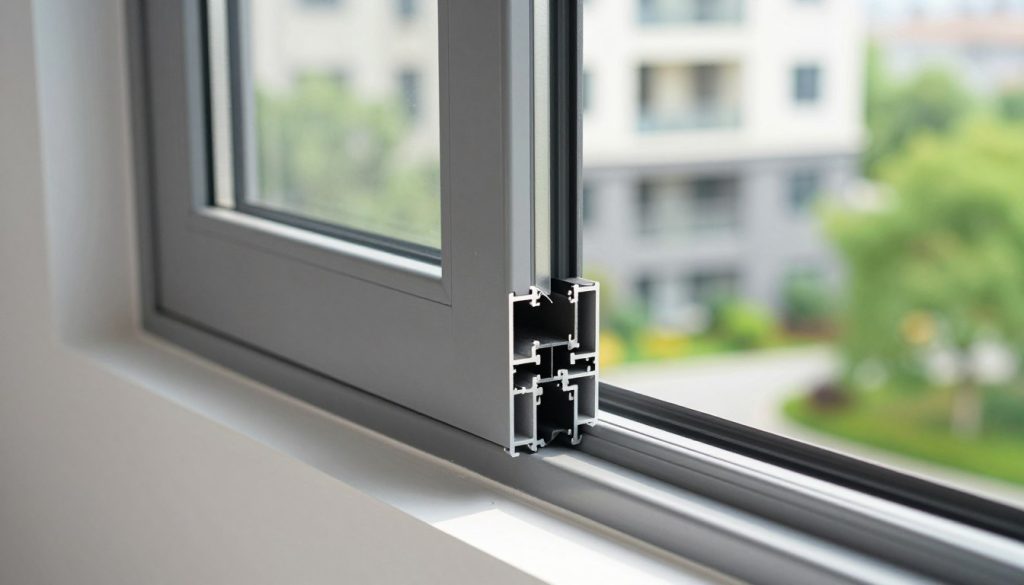
Metal framing is popular in South African homes for good reasons: it offers strength, long life, and lower routine maintenance than some materials. Still, durable does not mean immune. Over years, seals wear, hardware loosens, and impacts or harsh weather can create real faults.
Coastal salt air, strong sun, and daily use all speed gradual wear. Small defects such as a failing seal or a misaligned sash may seem minor. Yet they can let drafts and moisture move into the wall cavity and reduce comfort.
How timely attention helps
Early repairs are usually simpler and cheaper than major restorations. Fixing a seal or adjusting a track keeps insulation performance steady and limits heat gain or loss.
- Durability: metal frames can last up to 40 years with proper care.
- Common long-term issues: seal wear, hardware faults, and impact or weather damage.
- Energy: tighter seals reduce unwanted air exchange and support energy efficiency.
- Maintenance mindset: periodic checks help windows reach their full lifespan.
| Condition | Likely Cause | Practical Benefit of Early Repair |
|---|---|---|
| Drafts or cold spots | Worn seal or misaligned sash | Restores insulation, lowers running costs |
| Sticking or noisy operation | Dirty tracks or loose hardware | Smoother use and less damage to parts |
| Surface dents or finish wear | Impacts and sun exposure | Prevents corrosion and extends service life |
Common Aluminium Window Problems Homeowners Notice
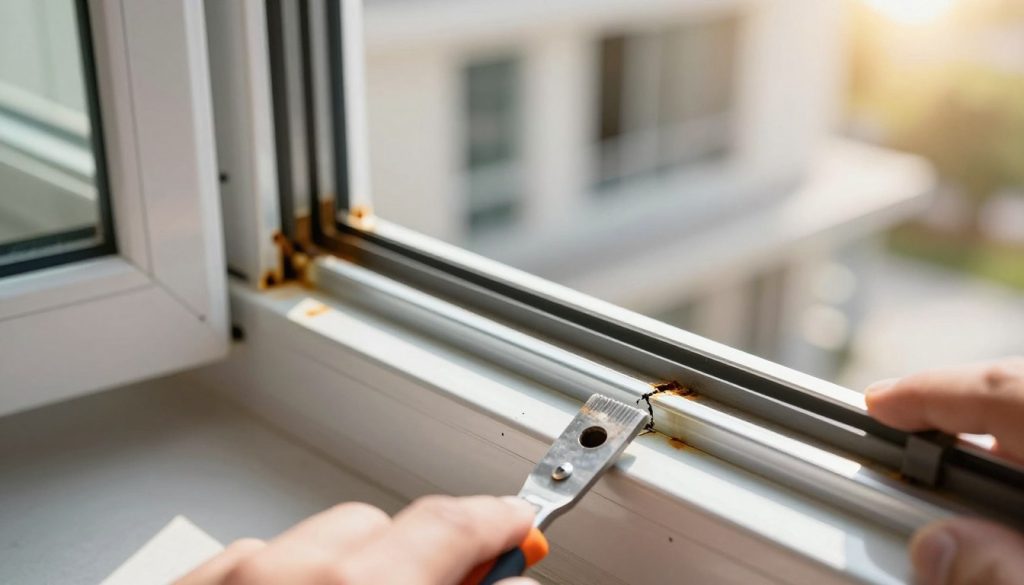
Simple signs like noise, stains or rough movement usually point to an underlying fault. This diagnostic checkpoint helps property owners match what they see to likely causes before any repair work begins.
Scratches, dents and surface wear
Minor scratches affect the look and are mostly cosmetic. Deeper dents can deform sealing edges and lead to functional damage.
Seal failure, condensation and drafts
Condensation between panes and drafts at the sash indicate worn seals. Replace or renew seals when air or moisture crosses the barrier.
Water leaks, gaps and frame movement
Drips after rain, staining near the opening, or visible gaps when closed suggest water entry or shifting frames. These symptoms require prompt attention to avoid interior damage.
Oxidation, corrosion-prone spots and grime buildup
Aluminium resists rust but can show surface deterioration where dirt and salt collect. Regular cleaning preserves finish and function.
Hardware issues with hinges, tracks and locks
Sticking, grinding sounds, loose handles, or misaligned locks point to dirty tracks or worn components. These faults often affect operation before structural failure occurs.
- Tip: Use this list to identify symptoms and choose the right how-to steps later in the guide.
Can Aluminium Window Frames Be Repaired
Assessing repair options starts with identifying which defects affect safety and which are purely cosmetic.
What’s typically repairable versus what isn’t
Common faults such as broken glass, failed seals, loose hardware, small dents and light scratches are usually repairable with standard tools and parts.
By contrast, severe deformation, persistent misalignment from structural movement, or extensive surface breakdown often limit repair options and may require replacement.
How the frame finish affects repair options
Frame repair includes restoring shape, restoring sealing surfaces, and matching the finish—not just hiding marks.
Plain metal tolerates careful sanding and filler. Coated or powder-coated finishes need matched touch-up paint or broader refinishing to look consistent.
Deep gouges that penetrate the surface can let water in and should be treated as more than cosmetic damage.
Practical approach: prioritise glass integrity, watertight seals and secure locks first. Then address appearance with a staged plan: diagnose, prepare, repair, and protect. For complex cases, seek a professional assessment in South Africa to ensure a durable solution.
Repair vs. Replace in South Africa: How to Decide
A practical decision balances repair cost, remaining years of service, and the likely gains in comfort and energy use.
When minor repairs make more sense than new windows
Localised fixes often restore function at low cost. Small seal failures, single-pane glass replacement, minor dents, and simple hardware work usually justify repair.
These repairs return smooth operation and reduce drafts without a full upgrade. For many a single unit is an affordable, fast solution.
When severe damage or age makes replacement smarter
Replacement becomes sensible when leaks recur after resealing, frames show major deformation, or multiple units are past useful service life.
If a set of doors or windows in one area share the same failure, upgrading several at once often yields better insulation and uniform performance.
How energy bills and insulation influence the call
Persistent drafts raise heating and cooling demand. Use simple data: if recurring repairs fail to stop air loss, the long-term energy savings from new units can outweigh upfront cost.
| Decision Factor | Repair Favours | Replace Favours |
|---|---|---|
| Cost | Low immediate cost for single faults | High upfront, lower operating cost over years |
| Performance | Restores function to one unit | Improves whole-home energy efficiency |
| Damage scope | Isolated seal, glass, or hardware issues | Widespread deformation or corrosion-prone breakdown |
| Service life | Units with many years left | Old units near end of useful life |
- Prioritise the worst-performing window or door first.
- Get a professional evaluation when multiple faults, to compare lifetime costs and find the best solution.
Tools and Materials You’ll Want on Hand Before You Start
Gathering the right tools and materials before any job saves time and reduces mistakes. This short checklist covers safety, surface prep, glazing needs, and paint so homeowners in South Africa can plan work with confidence.
Safety first: protective gloves and eye protection are essential for handling broken glass and controlling sanding dust. A dust mask is also recommended when sanding or using fillers.
- Cleaning: soft brush, lint-free cloths, and a mild cleaner to remove dirt from grooves and tracks without harming the finish.
- Repair compounds: aluminium repair putty for dents, filler for deeper scratches, and glazing compound for glass seating.
- Sealants and measuring gear: compatible sealant for perimeter work, tape measure for accurate glass width, and a straight edge to verify cuts.
- Paint: choose coatings formulated for aluminium and match sheen to the existing finish; apply multiple thin coats for best adhesion.
Prep advice: most failures start with poor cleaning or rushed curing. Allow recommended cure times between sanding, filling, and painting to ensure a durable outcome.
Cleaning and Prepping the Aluminium Frame for Any Repair
A careful clean reveals hidden faults and makes later repairs faster and more reliable.
Start by removing loose debris from tracks and corners with a soft brush. Clearing grit and visible dirt exposes worn seals and trapped grime that cause sticking.
Next, wash the surface with mild detergent and a lint-free cloth to see the real condition of the frame. Allow the area to dry before further work.
Removing dirt and debris from grooves and tracks
Use a narrow brush or compressed air to clear grooves. Packed dirt can misalign sliding parts and increase wear on hardware. Early cleaning often restores smooth operation.
Sanding rough spots and clearing broken material
Only sand where edges are rough or flaking. Level sharp edges and remove loose material, but preserve the surrounding finish. This creates a stable surface for fillers or sealant.
Spot-checking for corrosion and stuck areas before repairs
Inspect corners and places where water pools for early corrosion. Identify stuck points so the correct fix—cleaning, lubrication, or part replacement—can be chosen.
| Prep Step | Why it matters | Quick outcome |
|---|---|---|
| Debris removal | Prevents misalignment and wear | Smoother operation |
| Surface wash | Reveals hidden damage | Accurate diagnosis |
| Targeted sanding | Creates proper adhesion for repairs | Stronger fillers and paint |
| Corrosion check | Finds root causes of leaks | Better long-term results |
Prep saves time: careful cleaning and inspection improve adhesion for sealants, fillers, and paint. Proper preparation reduces repeat work and extends the life of windows in South Africa.
How to Repair Broken Glass in an Aluminium Window Frame
Removing broken panes requires a careful, step-by-step approach to protect people and preserve the frame. Safety and accurate measurements are the foundation of a durable glazing repair job.
Safe removal: isolate the area and wear protective gloves and goggles. Clear loose shards first, then use a putty knife to scrape away remaining glass and old bedding material. Work slowly to avoid bending the aluminium edges.
Measure for a snug fit
Measure the opening in two directions. Subtract roughly 1/16 inch to prevent binding and allow for thermal movement.
Record the final sizes and confirm them with the glass supplier before ordering the new pane.
Glazing and finishing
Apply an even layer of glazing compound into the rebate. Carefully press the new glass into place and use glazing points to secure the pane while the compound cures.
Smooth the compound for neat lines and improved water shedding. Once cured, check that the glass is stable and the edges are sealed to reduce leak risk.
- Isolate work, use gloves and eye protection.
- Use a putty knife for old compound to avoid deforming the frame.
- Measure accurately and subtract ~1/16 inch.
- Apply compound, set pane, insert glazing points, smooth finish.
- After cure, verify stability and edge sealing.
How to Fix Dents in Aluminium Window Frames
A localised dent can be restored to near-original condition with the right filler and a careful finish.
Minor impacts that do not affect sash alignment or locking are good candidates for filler-based restoration. These fixes preserve service life and avoid the cost of full replacement.
Filling dents with aluminium repair putty and leveling the surface
Clean and degrease the damaged area first. Remove loose paint and any corrosion with a soft brush.
Apply aluminium repair putty in thin layers. Allow each layer to cure fully before adding the next.
Once cured, use fine sandpaper to level the patch. Feather edges into the surrounding surface for a smooth join.
Sanding and blending so the repair disappears
Progress from medium to fine grit to remove high spots. Blend the repair so the transition is invisible to the eye and hand.
Repair work often exposes nearby scratches; treat these at the same time to ensure a consistent finish.
Finish with multiple thin coats of suitable aluminium paint, matching sheen and colour where practical.
- Final check: run a hand lightly over the area to confirm the repair is flush and will not trap water.
- Use thin paint coats and allow full drying between layers to improve durability.
| Issue | Action | Outcome |
|---|---|---|
| Small dent, no misalignment | Clean, fill with putty, sand, paint | Restored appearance and sealed surface |
| Shallow dent with scratches | Fill and feather, sand scratches, touch-up paint | Even finish, reduced corrosion risk |
| Deep dent near lock or sash | Assess for alignment; consider professional service | Ensures safe operation and long-term sealing |
How to Remove Scratches from Aluminium Window Frames
A clear assessment of scratch depth and finish type directs the correct repair path. Light marks often need only gentle abrasion and a small paint touch-up. Deeper cuts that form a gap require filling and sealing to stop water entry.
Light scratches on plain metal using fine sandpaper
For bare metal, use the finest grit and sand by hand. Work gently along the scratch until the edge softens and the surface feels even.
Clean the dust away and inspect the result before any paint is applied.
Touch-up paint: matte versus glossy finishes
Matte surfaces blend well with a matched acrylic touch-up paint. Glossy finishes often need automotive-style paint to match sheen and avoid a patchy look.
Tip: test paint on a hidden area first to confirm the colour and sheen match.
Deep scratches that can let in water
If a scratch creates a pinhole or gap, fill it with a suitable composite filler. Allow full cure, sand smooth, then prime and paint to restore the protective surface.
When full repainting is the better cosmetic solution
When scratches are widespread, colour is uneven, or many prior touch-ups exist, a full repaint gives a consistent look and longer protection. This is often more cost-effective in the long run.
- Differentiate superficial marks from functional gaps before starting.
- Feather-sand edges, use filler for deep defects, then sand and paint after curing.
- Remove minimal material when sanding to protect the original finish.
| Scratch Type | Action | Expected Outcome |
|---|---|---|
| Surface scuff | Fine hand-sanding, clean, acrylic touch-up | Reduced visibility, preserved surface |
| Coated finish scratch | Light clean, minimal sanding, matched paint | Blended repair with minimal mismatch |
| Deep cut causing gap | Fill with composite, sand, prime, paint | Sealed edge, prevents water entry |
| Multiple scratches and faded look | Full repaint with proper primer and topcoat | Uniform appearance and renewed protection |
Replacing Weatherstripping and Seals to Stop Drafts and Leaks
Replacing worn weatherstripping is a high-impact, low-cost step to stop drafts and leaks. Inspect seals for visible cracking, flattened profiles, or daylight at the edge. Listen for whistling in wind and note cold or hot spots around the opening.
Removing old material and prepping the contact surface
Strip the old weatherstrip carefully and remove adhesive residue. Use a mild cleaner and allow the area to dry fully so new materials bond well. Proper cleaning prevents trapped grit that shortens life of the new seal.
Installing new weatherstripping for tight edges and better insulation
Fit the new strip continuously around the perimeter. Keep corners neat and avoid stretching, which causes shrink-back and gaps later. Close and lock the window to confirm even compression and full contact along the seal.
Adding sealant around the perimeter for extra leak protection
Apply a controlled bead of compatible sealant where small irregularities or movement exist. This supplementary barrier improves resistance to water and reduces air leakage.
- Outcome: tighter seals reduce drafts and support better energy efficiency.
- Use suitable materials for aluminium surfaces and follow manufacturer cure times.
Fixing Tracks, Hinges, and Locks for Smooth Operation
Small alignment complaints frequently trace back to grime in tracks rather than a bent frame. Early diagnosis keeps a minor hardware problem from becoming a costly repair job.
Symptoms of failing hardware and alignment problems
Common signs include sticking movement, scraping sounds, uneven closing, handles that do not latch, or locks that need force to engage.
If a nearby door shows the same stiffness, the cause may be exposure or general maintenance patterns rather than one isolated defect.
Cleaning and lubricating moving parts for better performance
Start by removing loose debris and trapped dirt from tracks and hinge pockets. Use a soft brush and a lint-free cloth.
Wipe contact surfaces clean, then apply a suitable lubricant sparingly to rollers, hinges, and lock mechanisms. Test operation and reapply only where needed.
When adjustment is enough and when parts should be replaced
Minor misalignment often corrects with hinge or striker adjustments. Tighten fasteners and realign locking plates first.
Replace worn rollers, bent hinges, or failing locks. These parts affect security and long-term performance and should not be reused if visibly degraded.
- Practical tip: do the job in dry weather and allow time for testing.
- Smooth operation helps secure locking, reduces wear, and protects the frame over time.
Final Inspection and Ongoing Maintenance to Extend Window Life
Inspecting repairs promptly helps spot leaks, loose glazing, or missing seals before they cause damage.
Begin with a short checklist. Confirm the glass is secure, glazing lines are smooth, and seals form a continuous bead. Look for gaps that could admit water or air.
Perform a controlled water test where safe. Lightly run water over the perimeter and watch drainage paths. Avoid forcing water into joints; the aim is to verify seals and drainage work under normal exposure.
Simple habits reduce corrosion and grime. Wipe frames and clean tracks monthly. Remove grit that can trap moisture and speed wear.
- Lubricate hinges, tracks, and locks twice yearly to reduce wear and keep operation smooth.
- Check seals annually and replace short sections early to prevent drafts and preserve insulation.
- Record maintenance dates to track service intervals and small repairs.
| Task | Frequency | Expected result |
|---|---|---|
| Visual post-repair check | After work | Confirms secure glazing and sealed edges |
| Cleaning and track clearing | Monthly | Reduces grime and corrosion risk |
| Lubrication | Every 6 months | Smoother operation, lower wear |
| Seal review | Annually | Prevents drafts and protects energy efficiency |
With regular maintenance, aluminium units in South Africa can serve a home for decades—often approaching 40 years. Routine care preserves comfort, reduces energy costs, and delays premature replacement.
Conclusion
A clear assessment and staged repairs often extend service life while saving cost.
Most common issues — broken glass, dents, worn seals, minor leaks and hardware faults — are repairable when owners use the right materials and prep carefully. Targeted work restores function and appearance for many aluminium windows and window frames.
The practical pathway in this guide remains: diagnose the issue, prep the surface, complete the repair, then seal and paint for protection. South African homeowners will often find repair the sensible first option; severe structural damage still warrants professional evaluation.
Addressing drafts, leaks, and sticking parts improves comfort and energy performance. DIY is acceptable for simple jobs with proper safety; call a pro for complex alignment, specialised finishes, or extensive damage. Maintain regular cleaning and checks to keep results lasting for years.